Having tested the waters with PiServer (Raspberry pi 4 powered NAS/Server), I thought I could use a step up, to experiment with ‘bigger toys’ similar to those used in a professional setting; an x86 platform.
One of the main aims for this project was to successfully run Windows 10 in a virtual machine using KVM(Kernel-based Virtual Machine) to run games as well as improve my knowledge on virtualisation. This PC is a linux based machine that I would go on to use for; cryptocurrency mining, linux kernel compilation, more containerised applications, reverse proxy servers and more.
Hardware
Staying true to the small form factor (SFF) of PiServer, I looked to accomplish something very similar with this new build. The r/sffpc subreddit was a great source as well as Optimum Tech on YouTube detailing the things to look out for when purchasing and building a small form factor PC.
Here’s a spreadsheet created by Redditor u/prayogahs that helped a lot.
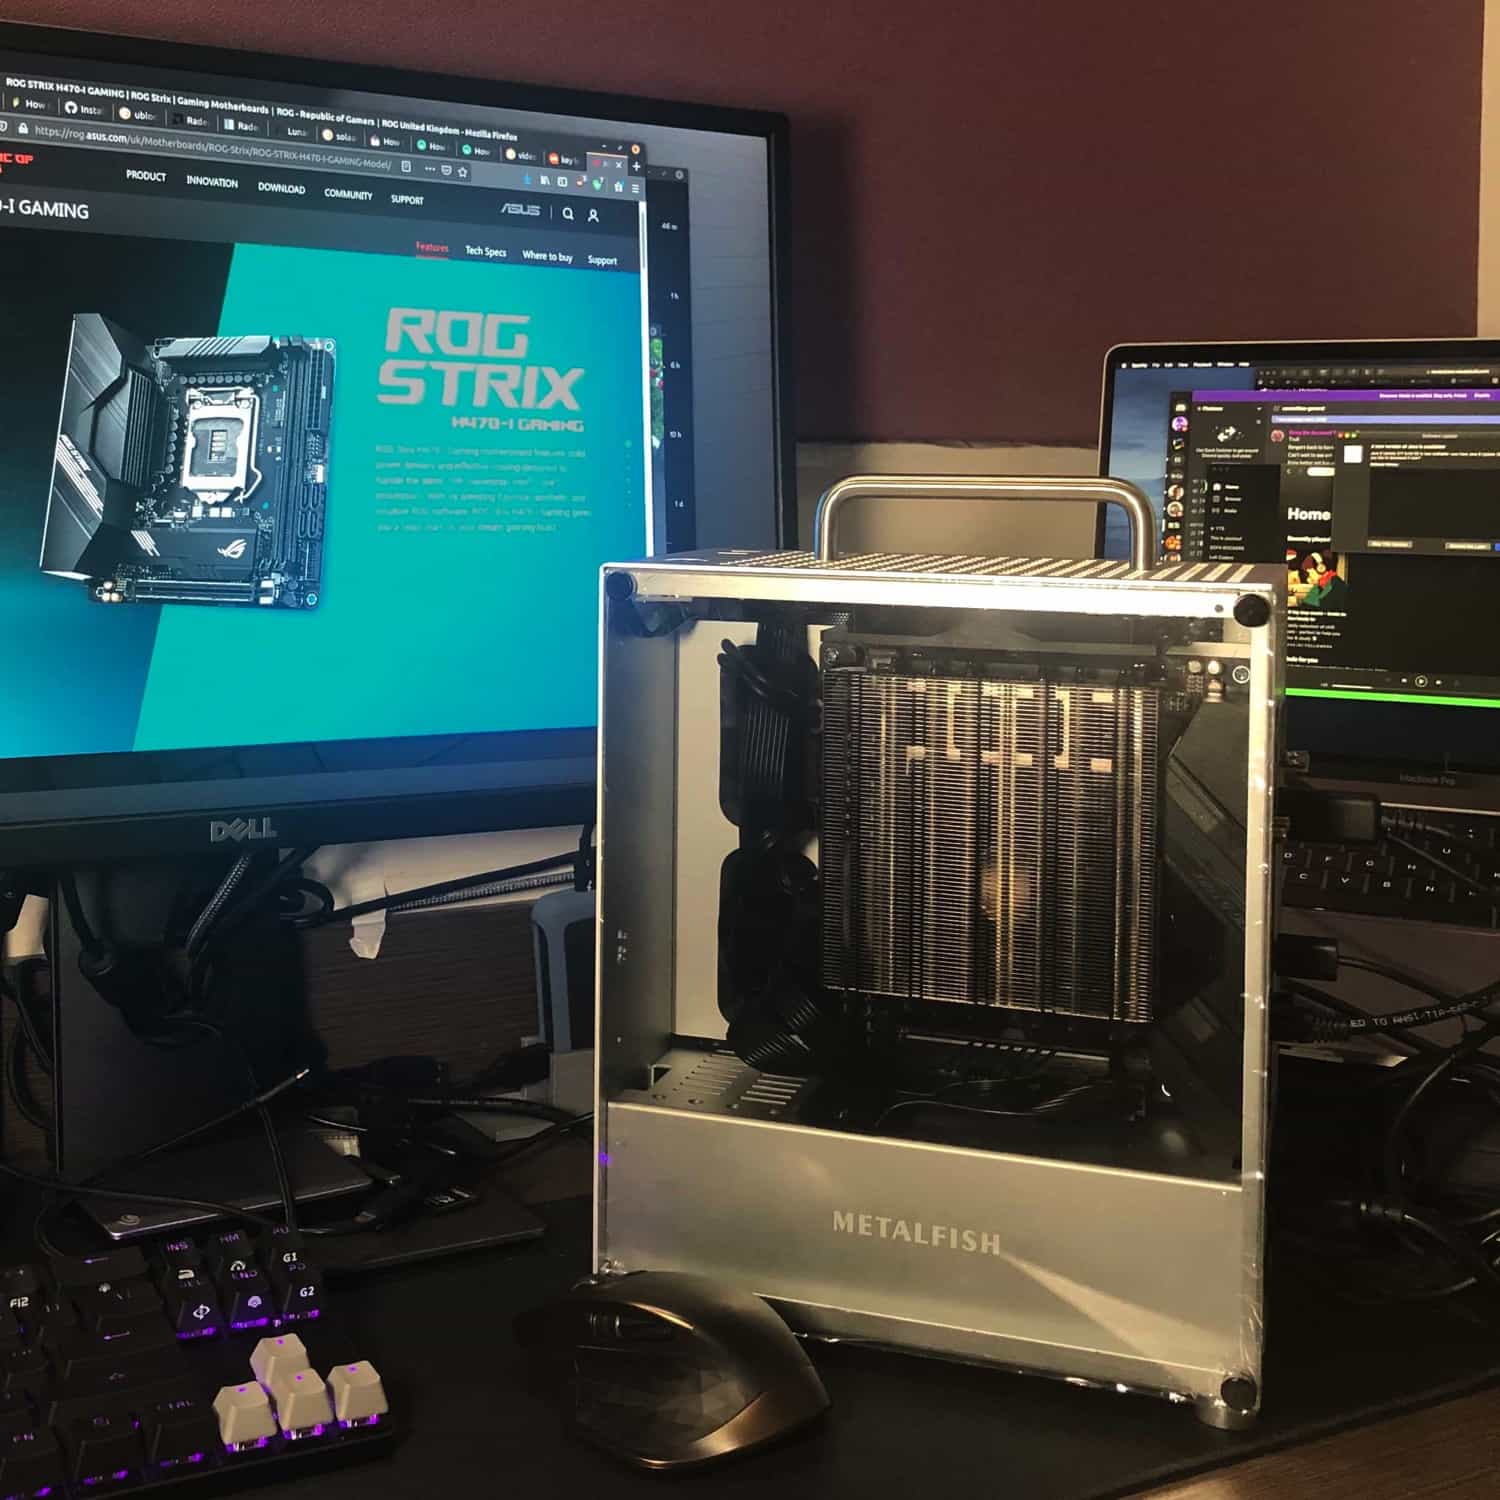
I opted for the Metalfish S3 plus and the rest of the specs are as follows;
- Intel i5-10400 6 Cores / 12 Threads CPU
- Alpenfohn Black Ridge CPU Cooler
- 32GB 2666MHz Corsair Vengeance LPX DDR4 RAM
- Radeon 5500XT GPU
- ASUS ROG H470-I Gaming Motherboard
- Corsair SF450 PSU 80+ Gold
- 240GB M.2 SATA SSD
- 500GB 2.5” SATA SSD
- 2TB 2.5” HDD
Software
I opted to use Linux Mint as my base OS after a lot of research and indecisiveness. My reasons were; it is based on Ubuntu which is very popular and documentation is plentiful and it runs Cinnamon DE (Desktop Environment) which I find mostly pleasing perhaps due to its similarities with Windows (I have yet to try out a Window Tiling Manager). I tested a number of other distros (Linux Distributions) including Arch with KDE Plasma DE which I ultimately decided against as I wanted the server PC to be as stable as a rock.
Fast forward onto the super interesting and time consuming part of this setup, after tweaking fan curves for whisper silence, upgrading from 16GB to 32GB RAM and setting up Samba and Docker as it was on PiServer. It was time to set up Windows and macOS in a virtual machine using KVM.
Kernel-based Virtual Machine (KVM) - wiki
I discovered KVM, a Type 1 Hypervisor by watching, SomeOrdinaryGamers on YouTube and I was so intrigued by the capabilities and security benefits from running a virtual machine. KVM is special because as it says in its name, it virtualises at the kernel level which does wonders for performance in VMs and best of all, GPU’s and other peripherals can be “passed” to the VM effectively making the VM have full control of PCIe devices and other devices as it would if it were running bare metal (not under a VM).
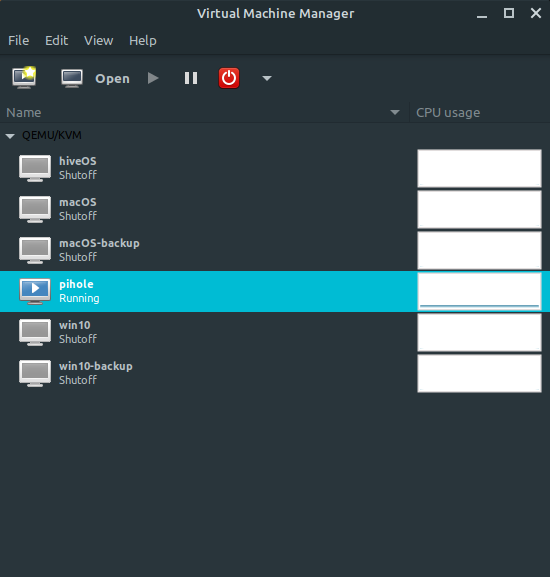
Virt-Manager UI for KVM
Windows VM
Installing Windows 10 was easy enough using multiple guides and the very detailed Arch documentation. As a disclaimer, Arch uses a slightly different configuration process to most ubuntu based distros, so your search may need to be specific. This guide by Mathias Hueber made setting it up on Linux Mint simple, PCI Passthrough Guide.
macOS VM
Installing macOS is different to say the least and compatibility is inconsistent across different hardware, although less of an issue for a basic setup in a virtual machine. I followed the guide by Kholia, OSX-KVM which uses OpenCore as opposed to Clover, with the general consensus being OpenCore has a better future.
A tip, if you’re having issues with OpenCore GPU Passthrough; I mounted the OpenCore-Passthrough.qcow2 image and added ‘agdpmod=pikera’ to boot-args in the OpenCore config.plist, to get GPU Passthrough to work with my Radeon Card (Nvidia graphics cards are not supported in macOS versions past High Sierra).
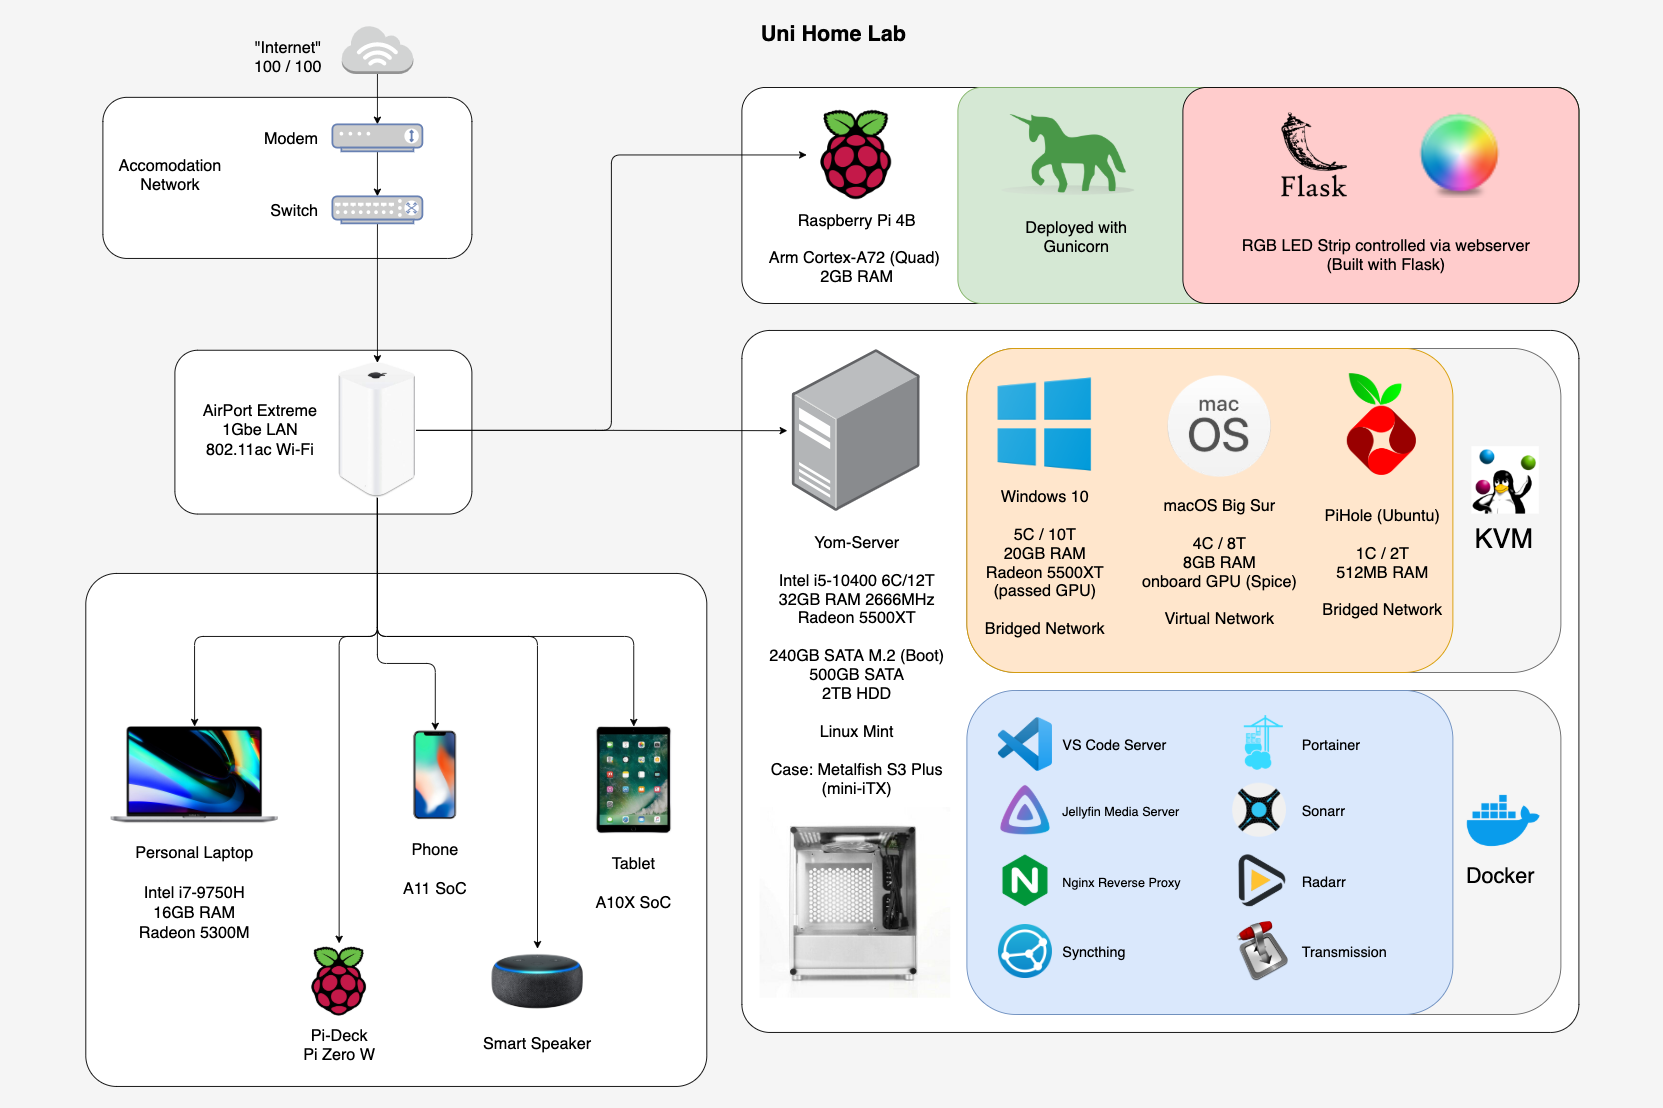
Home Lab Network Diagram
Conclusion
I didn’t go into the nuances I stumbled on with this setup as they kept me up for many nights and I would prefer not to but if you come across any issues, I would love to help out, granted I’m no expert. The r/VFIO subreddit and discord have loads of helpful information too. And if you didn’t already know, reading error logs help a ton.
I do want to mention that going with a Radeon GPU prior the new generation GPUs (Big Navi), you will most likely face the radeon “PCIe Reset Bug”, which now has a fix from Geoffrey McRae with Reddit username gnif2 that doesn’t require recompiling the linux kernel anymore (I had fun compiling the linux kernel though).
I’ve gone ahead to do a lot more with this build that I’ll document at a later date, cryptocurrency mining with hiveOS being one of them. I have learned a lot from doing all of this, I urge you to give it a go if you are considering building a similar setup.